The 200A Hall Effect sensor needs to be calibrated at 0A to get correct readings. The parameters in documentation are based on an average from the sensor’s manufacturer, which is “good enough” for casual use. But if you’d like to calibrate it to get more accurate readings about the zero point, follow these instructions. This calibration should only ever need to be done once per board:
-
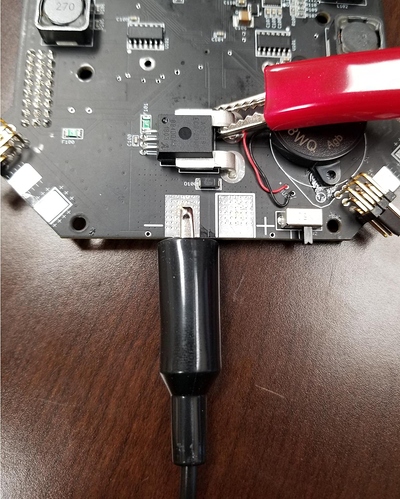
Using a bench-top power supply or a battery, use alligator clips to connect the positive wire to the in-board bus bar of the current sensor. This will energize the entire board, but bypass current through the current sensor. This way, you can get a true 0A reading.
-
Power up the board in this configuration and connect to Mission Planner. Set the following parameters to these temporary values:
BATT_AMP_OFFSET = 0
BATT_AMP_PERVOLT = 1
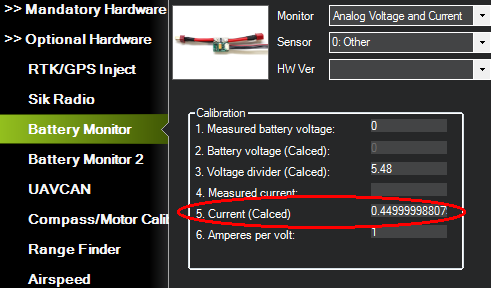
Doing this will cause Mission Planner to report the direct analog voltage it is reading from the current sensor.
-
Go to Initial Setup → Optional Hardware → Battery Monitor. In the calibration box, read the value for “Current (Calced)”. That is your offset voltage at 0A.

-
Set the offset parameter to the value you read in #3:
BATT_AMP_OFFSET = [value]
BATT_AMP_PERVOLT = 50 -
Power down and reattach the positive cable to the main solder pad. Your current offset voltage should now be calibrated.
